
If starting out on your cork flooring project seems daunting at first, don’t worry. It’s only the unfamiliarity with the material that makes you hesitate. In reality, cork projects prove to be easier, quicker and more simple to execute, as long as you take the time to plan ahead and gather the right tools and materials. Here are some things to consider as you sketch out your project.
Cork Thickness
How to decide whether 4mm, 6mm, 8mm or 12mm is right for your project? This is largely a personal preference issue, although certainly thicker cork sheets will give you greater longevity, particularly if you plan to sand/repair it often (most hardly ever do). Thicker cork will give a little more cushion underfoot. Thinner cork will follow contours more closely, and save you some money. 6mm or 8mm are the most common choices for nearly every kind of project. Note that 12mm thickness requires more caulking material to fill the deeper groove. You should plan on three cartridges per square meter, instead of two. (50% more). SeaCork France also maintains lower stock levels of the 12mm thickness, sometimes resulting in shipping delays of 1-3 weeks.
Grooved vs Flat Sheets
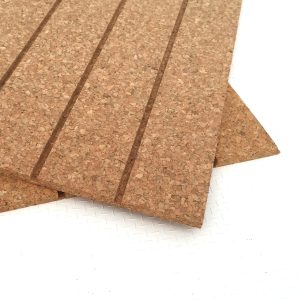 This is largely a question of style, a traditional nautical look versus something more modern and sparse. Some prefer the natural, clean look of cork by itself. Many insist that the caulk lines in a floor or deck add to the perception of length and space. Others find that caulk lines help disguise dirty areas. But there is no denying that grooved sheets and planks, with the accompanying caulk, will create more work on the install. And additional material cost.
Cork Sheets vs Planks
If your project has a large number of long, subtle curves along the same direction as the grooves (typically fore and aft on a boat), you may prefer narrow planks (47mm*, 73mm, 103mm or 125mm), which will allow you to follow these curves with the product. For almost all other projects, cork sheets will prove more efficient for installation. Even in these cases, however, you should likely choose a small number of additional planks to cover short ends or corners where cutting into new sheet would prove wasteful. There have been a few large, traditional yachts that have cut (custom) wider planks from non-grooved sheets. Of course typical home projects are blissfully simple, with lots of large, easy rectangles.
*47mm is most popular, matching the classic teak look, and also matches the dimensions of the grooved SeaCork sheets.
NOTE: All plank widths given are total width for area coverage, but all include a rabbet on one side for caulk groove fill (e.g. 47mm plank will result in 43mm visible cork plus ~4mm caulking groove)
Border vs None
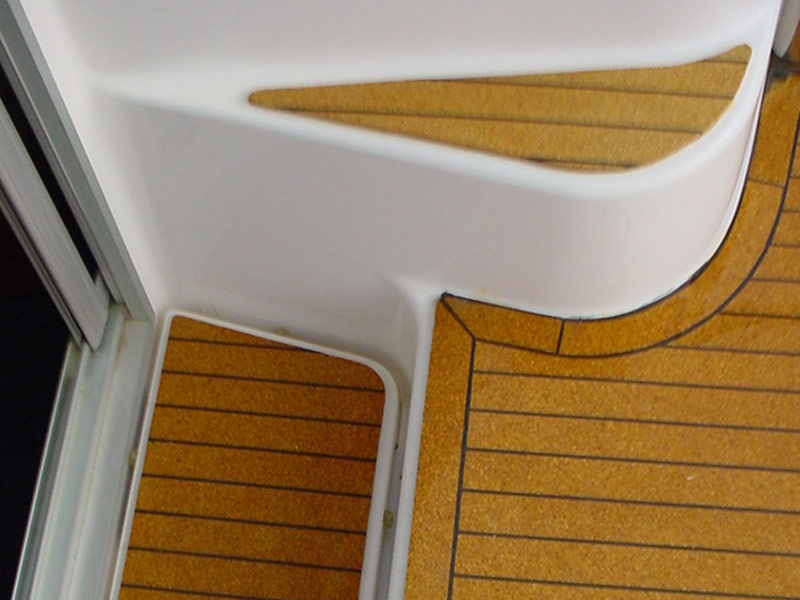
Border vs none on same project
Again, a stylistic choice. Traditionally teak borders were included on decks to cover the end grain of the planks, to protect from excess water intrusion and expansion. With cork, there are no such concerns. Still, many will prefer that traditional nautical look, and borders reduce the number of open black caulk ends on your pieces. It also proves to be a simpler installation process, as the main sections and planks can be laid into place without requiring perfect ends. The excess is cut to fit the border and you end up with a precisely finished product without extensive templating. Be careful planning border pieces on sections that are rather small. If the main grooved area isn’t at least 4 or 5 times the size of the border, these sections may look a bit odd.
Measuring
All cork products are sold in metric units, so it’s certainly easiest to measure that way if you can. If not, we have a simple calculator for your use. Avoid the temptation to simply add all your dimensions together for a total, as this will result in an inaccurate calculation, followed by an inaccurate (and grossly exaggerated) estimate. Convert each measurement to centimeters, and then calculate the square centimeters of each section. Add all of these figures up to get your total area. Move the decimal four places, and you’ve arrived at your total area in square meters. Add 5-15% additional for cutting waste. (Our Project Area Calculator makes all this very easy.) Now you’re ready to go shopping.
Overage/Waste
Every project will have a certain amount of waste material, which is why it’s important to add 5-20% to your order. Aggressive curves, triangular or trapezoidal shapes will all result in substantial waste. You have two options:
Option 1) Measure each section of your project as if they were complete rectangles. Your measurements will reflect the longest length and the widest width of each area. This method will result in a larger calculated area, but virtually no risk of coming up short.
Option 2) Measure each section as accurately as possible, and add a figure for overage. Realize that you will be nesting odd shapes together wherever possible, and that some pieces may end up with multiple seams. Good rules of thumb for determining overage for your order:
- Perfect rectangles, or only slightly rounded rectangles: 5% overage
- Mostly proper rectangles with a few sections with curved ends: 10% overage
- Roughly half rectangles and half trapezoid or narrowing shapes: 15% overage
- Circles, lots of dramatic curves, odd corners: 20% overage